The Massachusetts Bay Transportation Authority offers free access to an API that allows a user to track locations of busses within the MBTA system. The goal of this project was threefold:
- To demonstrate a use case of location-based applications
- The MBTA API will determine the position of buses (longitude and latitude) along Route 1 and the output will be visualized using a flask web application running Mapbox.
- Use web-development tools (Flask and Mapbox API) to visualize the data
- A MySQL database will store the information retrieved from the MBTA API. We will periodically make calls to the MBTA API, parse the JSON data returned by the API, and insert new rows into the My SQL table.
- Demonstrate change data capture (CDC) between two databases (MySQL to MongoDB using Debezium).
- Change data capture (CDC) is necessary to propagate changes from the master database to other databases. We will use Debezium to monitor changes to the MySQL database and propagate the changes to a MongoDB database.
Setup Application Databases
Create Docker Network
We will use Docker to create the databases needed. First, we will setup a docker network MBTANetwork to allow MySQL and MongoDB containers to communicate.
1
    (bt_3) C:\Users\VP1050>docker network create MBTANetwork
Create MySQL Container
Next, within a .sql file we lay the groundwork for a sql database that will store the data from the MBTA API.
1
2
3
4
5
6
7
8
9
10
11
12
13
14
15
16
17
18
19
CREATE DATABASE IF NOT EXISTS MBTAdb;

USE MBTAdb;

DROP TABLE IF EXISTS mbta_buses;

CREATE TABLE mbta_buses (
    record_num INT AUTO_INCREMENT PRIMARY KEY,
    id varchar(255) not null,
    latitude decimal(11,8) not null,
    longitude decimal(11,8) not null,
    label varchar(255) default null,
    current_status varchar(255),
    current_stop_sequence int,
    occupancy_status varchar(255),
    speed decimal,
    updated_at varchar(255),
    direction_id int
);
We reference the SQL file within the dockerfile that will build our MySQL container:
1
2
3
4
5
6
7
8
FROM mysql:8.0

ENV MYSQL_DATABASE=MBTAdb \
    MYSQL_ROOT_PASSWORD=JarvinDB

ADD MBTA.sql /docker-entrypoint-initdb.d

EXPOSE 3306
Next we run the docker build command and then docker run command for the MySQL container:
1
2
3
C:\Users\VP1050\OneDrive\Documents> docker build -t mysqlmbtamasterimg .

C:\Users\VP1050\OneDrive\Documents> docker run --name mysqlserver -p 3300:3306 --network MBTANetwork =d mysqlmbtamasterimg
If using docker desktop, we should see:

Create Python Client for Mysql Database
1
2
3
4
5
6
7
8
9
10
11
12
13
14
15
16
17
18
19
20
21
22
23
24
25
26
27
28
29
30
31
32
33
34
35
'''mysqldb.py'''
import urllib.request, json
import mysqldb
import sys
import mysql.connector

def insertMBTARecord(mbtaList):
    mydb = mysql.connector.connect(
    port = 3300, #local port
    user="root",
    password="------",
    host="127.0.0.1",
    db="MBTAdb",
    use_pure = True
    )

    mycursor = mydb.cursor()
    #complete the following line to add all the fields from the table
    sql = """insert into `mbta_buses` (
        id, latitude, longitude, current_status, current_stop_sequence, occupancy_status, speed, updated_at, direction_id, label)
        values (%s,%s,%s,%s,%s,%s,%s,%s,%s,%s);"""


    for mbtaDict in mbtaList:
        #complete the following line to add all the fields from the table
        val = (
            mbtaDict['id'], mbtaDict['latitude'], mbtaDict['longitude'],
            mbtaDict['current_status'], mbtaDict['current_stop_sequence'], mbtaDict['occupancy_status'],
            mbtaDict['speed'], mbtaDict['updated_at'], mbtaDict['direction_id'], mbtaDict['label']
            )
        mycursor.execute(sql, val)
        #mycursor.execute(sql_1, mbtaDict['bus_label'])

    mydb.commit()
Create Python Client for MBTA API
We can create a python script that gets data from the MBTA API and converts the JSON expressions to a python dictionary. We will use the insertMBTARecord() function from the mysqldb.py to insert the data into the MySQL database.
1
2
3
4
5
6
7
8
9
10
11
12
13
14
15
16
17
18
19
20
21
22
23
24
25
26
27
28
29
30
31
'''MBTAApiClient.py'''
import urllib.request, json
import mysqldb
import sys

def callMBTAApi():
    mbtaDictList = []
    mbtaUrl = 'https://api-v3.mbta.com/vehicles?filter[route]=1&include=trip'
    try:
        with urllib.request.urlopen(mbtaUrl) as url:
            data = json.loads(url.read().decode()) # Convert bytes to a str
            for bus in data['data']:
                busDict = dict()
                # complete the fields below based on the entries of your SQL table
                busDict['id'] = bus['id']
                busDict['latitude'] = bus['attributes']['latitude']
                busDict['longitude'] = bus['attributes']['longitude']
                busDict['label'] = bus['attributes']['label']
                busDict['current_status'] = bus['attributes']['current_status']
                busDict['current_stop_sequence'] = bus['attributes']['current_stop_sequence']
                busDict['occupancy_status'] = bus['attributes']['occupancy_status']
                busDict['speed'] = bus['attributes']['speed']
                busDict['updated_at'] = bus['attributes']['updated_at']
                busDict['direction_id'] = bus['attributes']['direction_id']
                mbtaDictList.append(busDict)
        mysqldb.insertMBTARecord(mbtaDictList)
    except:
        print(sys.exc_info())
    return mbtaDictList

#print(callMBTAApi())
Setup the MongoDB Database
We will setup a MongoDB database to transfer data from the previously established MySQL database. We can run the following command:
1
C:\Users\VP1050\OneDrive\Documents> docker run -p 27017:27017 --name some-mongo --network MBTANetwork -d mongo
Within Docker, the container will show as below:

Setup Web Application Environment
Create Python Flask Web Server to call MBTA API
The server file will import the previously created MBTAApiClient.py file.
1
2
3
4
5
6
7
8
9
10
11
12
13
14
15
16
17
18
19
20
21
22
23
24
25
26
27
28
'''server.py'''
from threading import Timer
from flask import Flask, render_template
import time
import json
import MBTAApiClient

# ------------------
#    BUS LOCATION
# ------------------

# Initialize buses list by doing an API call to the MBTA database below
buses = MBTAApiClient.callMBTAApi()

def update_data():
    global buses
    buses = MBTAApiClient.callMBTAApi() #this variable captures the list of buses and their attributes

def status():
    for bus in buses:
        print(bus)

def timeloop(): #The bus list and data is output to the console and updated every 10 seconds.
    print(f'--- ' + time.ctime() + ' ---')
    status()
    update_data()
    Timer(10, timeloop).start()
timeloop()
The webserver portion of the server.py file defines two web pages: the rendered map, and the json dump of the “buses” python dictionary.
1
2
3
4
5
6
7
8
9
10
11
12
13
14
15
16
17
18
19
20
21
22
'''server.py'''
# ----------------
#    WEB SERVER
# ----------------

# create application instance
app = Flask(__name__)

# root route - landing page
@app.route('/')
def root():
    return render_template('index.html')

# root route - landing page
@app.route('/location')
def location():
    return (json.dumps(buses))


# start server - note the port is 3000
if __name__ == '__main__':
    app.run(port=3000)
Setup the Webpage to Disaply Mapbox
Map box requires an access token to create a map. Below is the format for javascript code. See the github repository.
1
2
3
4
5
6
7
8
9
10
// get and add you Mapbox access token at https://account.mapbox.com/ here
mapboxgl.accessToken = 'pk.---.---';

var map = new mapboxgl.Map({
    container: 'map',
    style: 'mapbox://styles/mapbox/streets-v11',
    center: [-71.091542,42.358862],
    zoom: 12
});
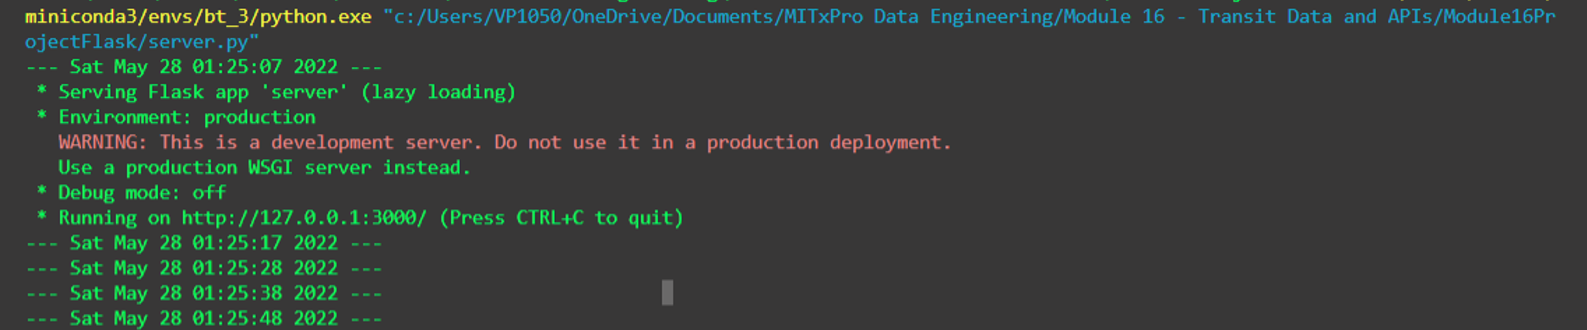
Running the Web Application
We run the application by running the previously created server.py file.
1
C:\Users\VP1050\OneDrive\Documents> python3 server.py
The output should show the timestamp and each bus with the accompanying attributes. The insertMBTARecord() function in the MBTAApiClient.py file will save the output to the MySQL database.
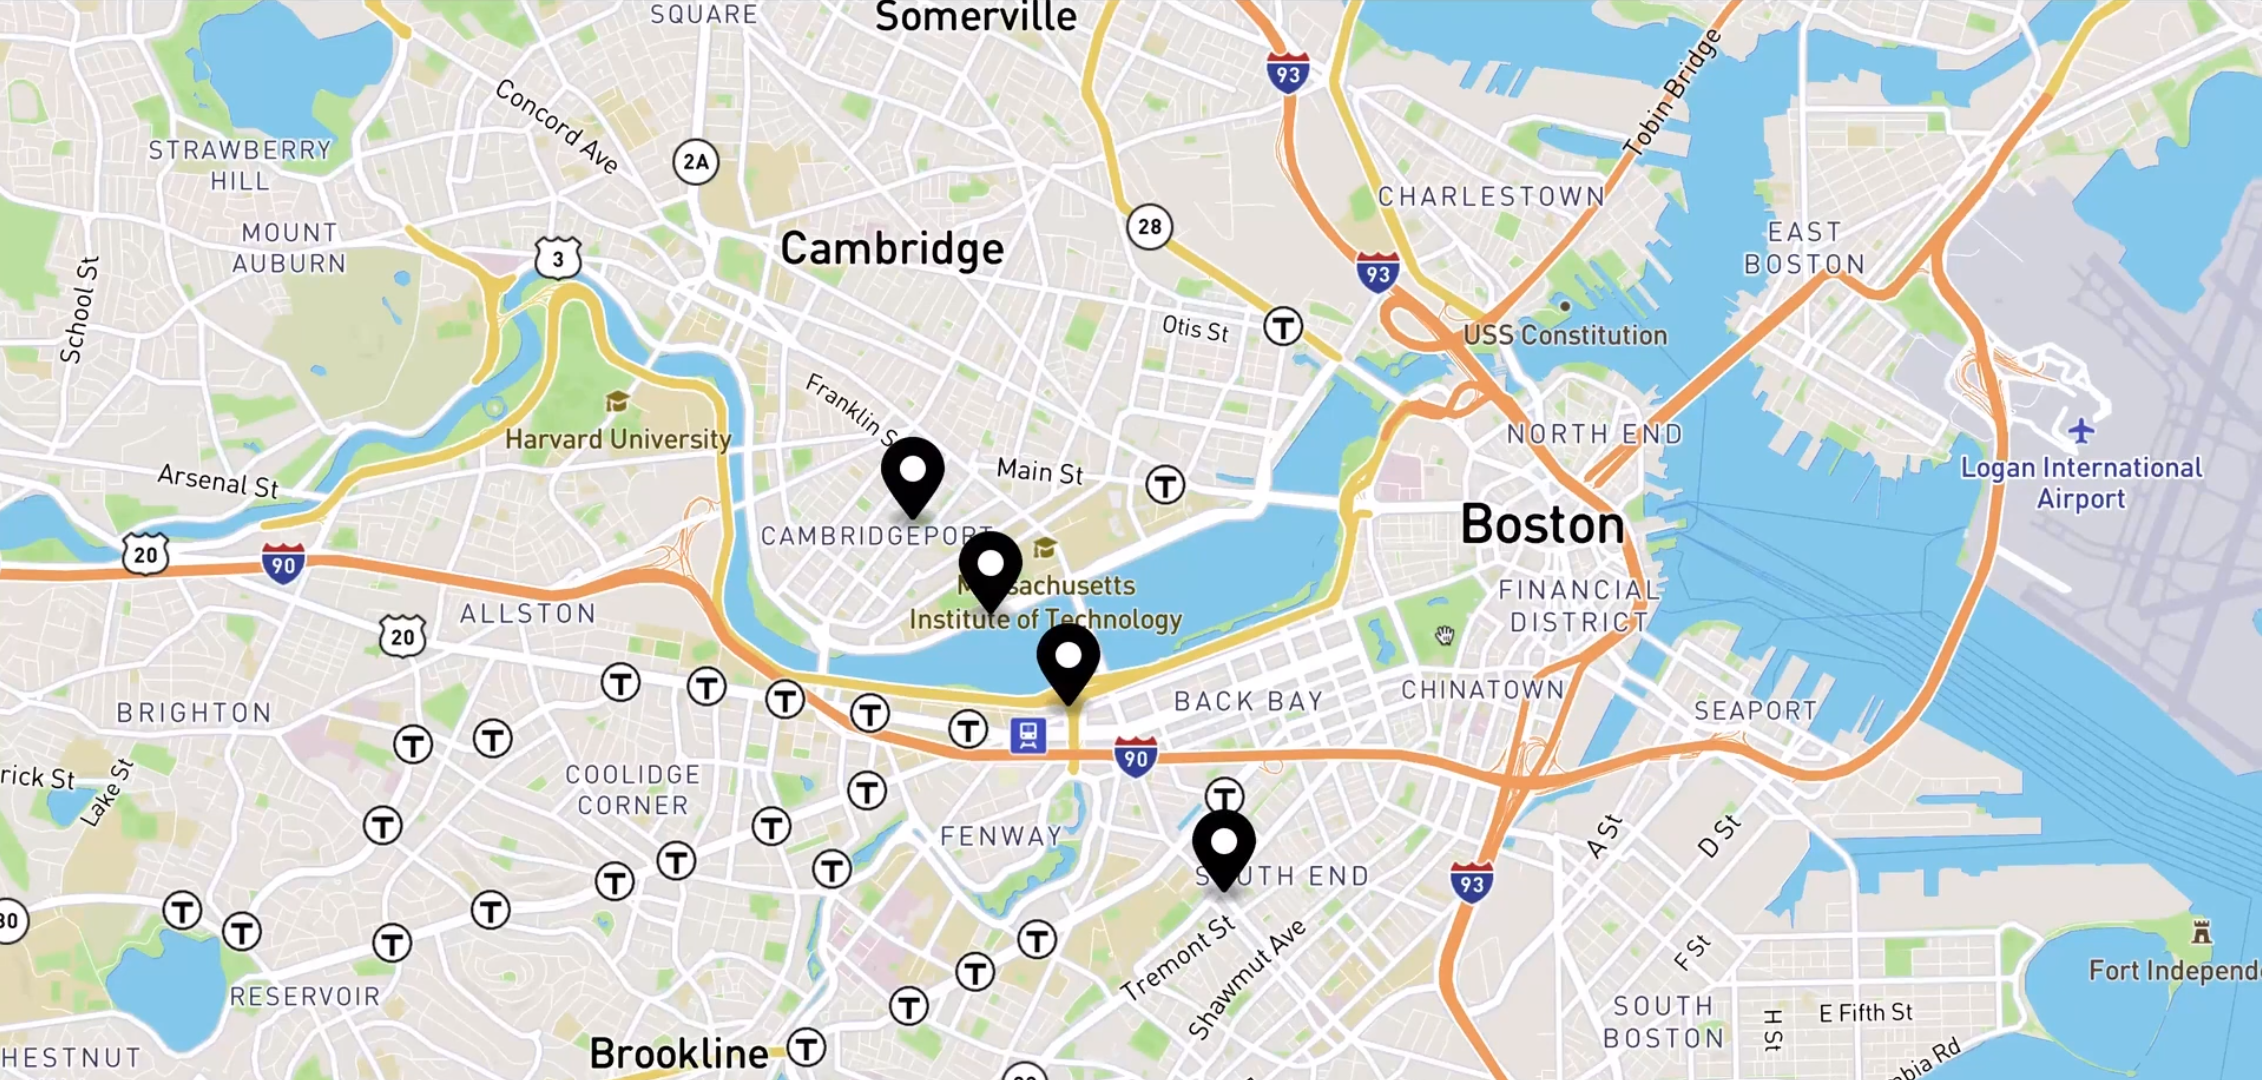
We can also check for the visual representation of bus location updates by going to localhost:3000 in a web browser.
Setup Change Data Capture with Debezium
Create Debezium Container
We will create a third docker container to communicate updates from the MySQL database to the MongoDB database.
1
2
3
4
5
FROM maven:3.6.3-openjdk-11 AS maven_build

COPY app /tmp/

WORKDIR /tmp/
Build the dockerfile outlined above and run the container.
1
2
3
C:\Users\VP1050\OneDrive\Documents> docker build -t debezium_1
C:\Users\VP1050\OneDrive\Documents> docker run -it -rm --debeziumserver --network MBTANetwork debezium_1 bash
Edit Debezium Configuration files
Note the settings in the DebeziumConnectorConfig.java file within \DebeziumCDC\app\src\main\java\mit\edu\tv\config. The database.port and database.password should be the same as the docker container running the MySQL database:
1
2
3
        return io.debezium.config.Configuration.create().
            .with("database.port", 3306)
            .with("database.password", "MyNewPass")
The java files within \DebeziumCDC\app\src\main\java\mit\edu\tv\listener allow the MongoDB to listen to changes within the MySQL database.
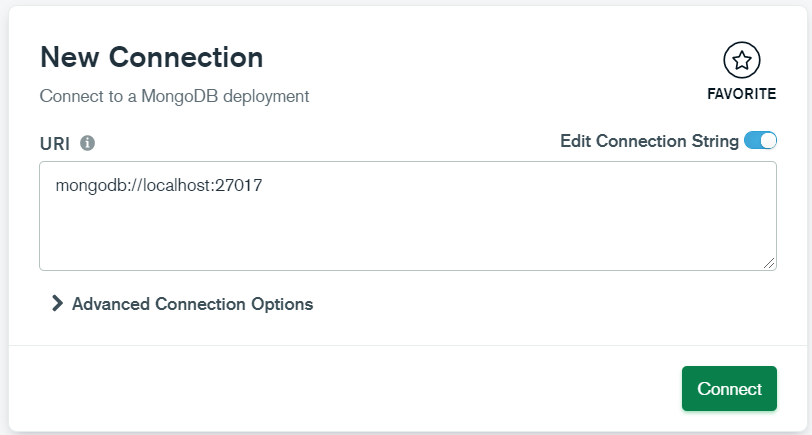
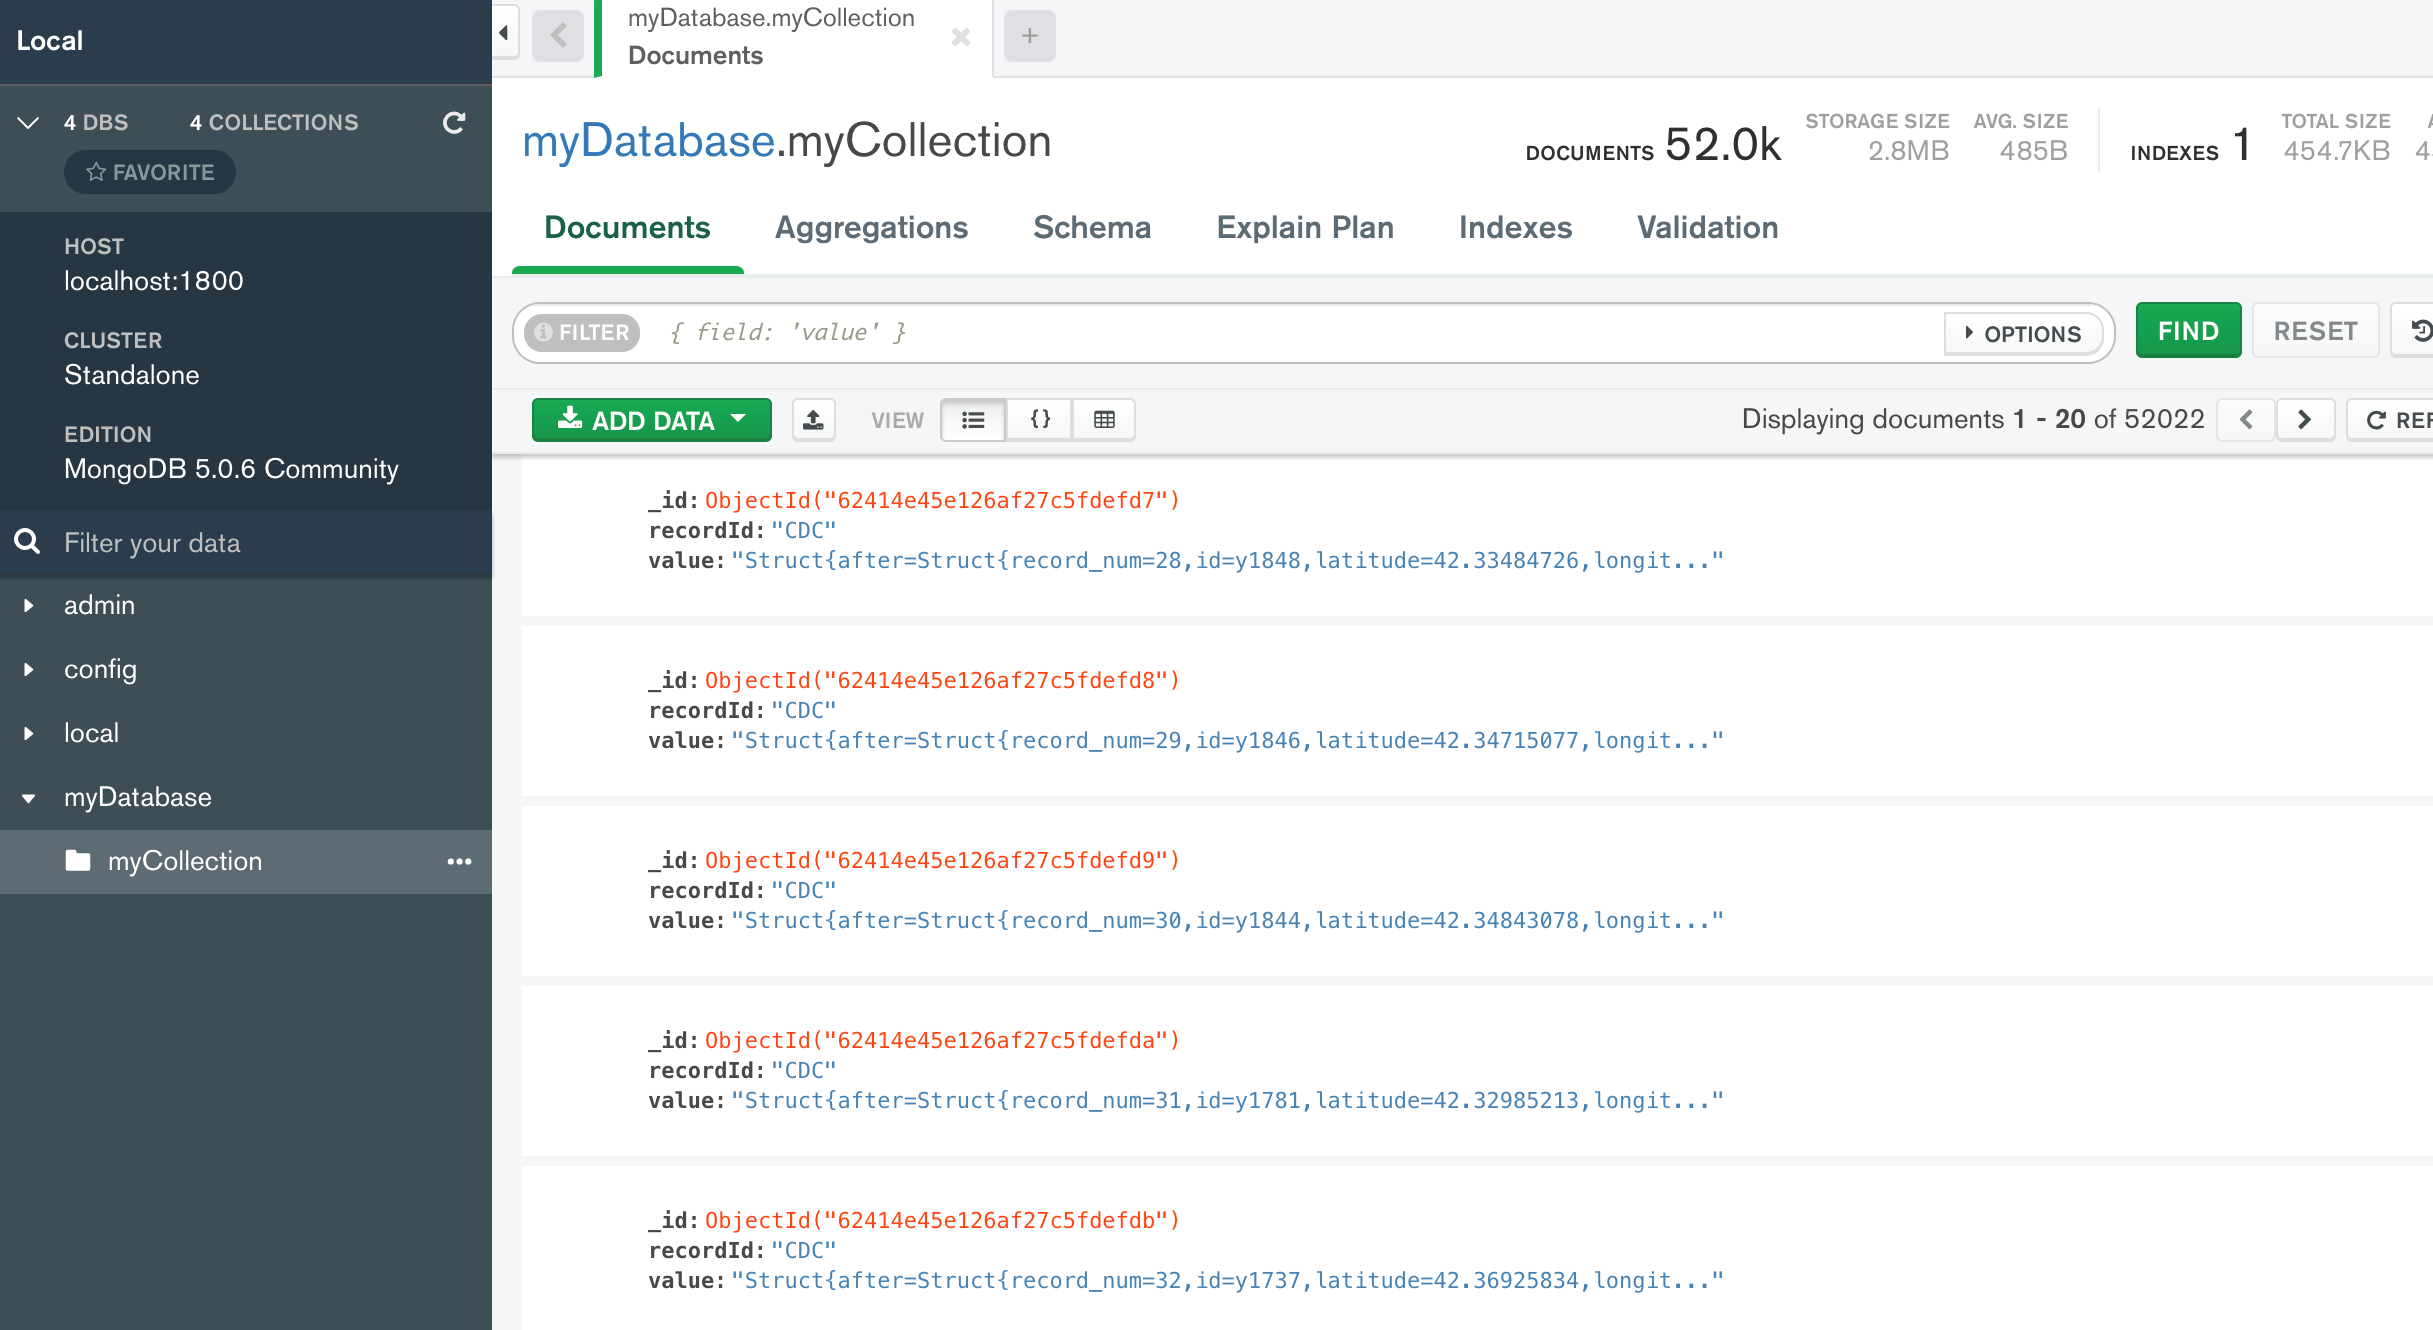
Confirm changes in the MongoDB database
Download the Compass client and connect to port 27017. View the changes being populated in the database.
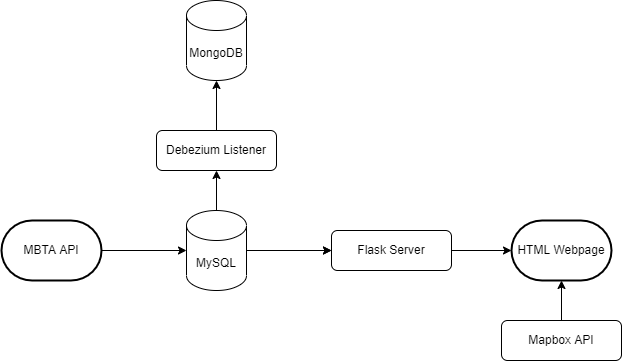
Conclusion
The flow chart below summarizes the process of capturing data from the MBTA API and propagating that data to a MySQL database and MongoDB database. The project files can be downloaded on Github.