
Kafka is an open-source distributed event streaming platform. The Confluent platform seen in the project runs an enhanced distribution of Kafka designed for community and commercial use. Using Python, Javascript, and a docker Kafka installation we can produce data and then create a web server that initiates the data consumption process.
Setup Kafka Docker Container
Running Kafka in Docker
We will first install Kafka in a docker container. If we navigate to the same directory as docker-compose.yaml, we can run the console command to start the container.
1
C:\Users\VP1050\OneDrive\Documents> docker-compose up

Creating a New Kafka Topic
WIthin the Confluent webpage running on localhost:9021, under “Topics” we can add a new topic to send data to called “vehicle-coordinates”. This topic should be created with default settings:
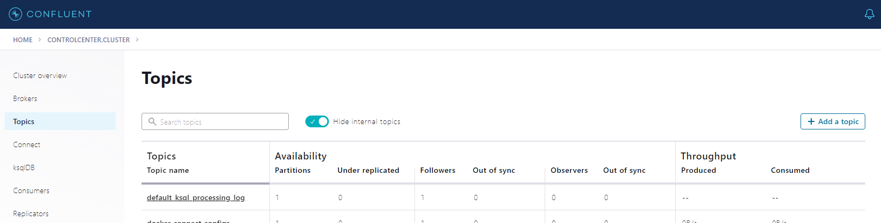
In the picture below we see the new “vehicle-coordinates” topic:

Creating a kafka-python Producer to Send Sample Data
The Kafka platform operates via producer and consumer. The producer creates and sends the data to the Kafka server.
kafka-python Setup
First we need to install kafka-python.
1
C:\Users\VP1050\OneDrive\Documents> pip install kafka-python
Next, we will create a python script to send data to the Kafka broker. In the PublishVehicleCoordinates.py file, we first define variables needed to specify the Kafka server.
1
2
3
4
5
6
7
8
9
10
11
12
13
14
15
16
'''PublishVehicleCOordinates.py'''
import kafka
import time
import random
import json
from time import sleep
import numpy as np

#define producer and consumer variable
sensor_data = {'longitude': 0, 'latitude': 0}
topic_name = "vehicle-coordinates"
client = kafka.KafkaClient(bootstrap_servers=['localhost:9092'])
producer = kafka.KafkaProducer(bootstrap_servers=['localhost:9092'],
                         value_serializer=lambda x:
                         json.dumps(x).encode('utf-8'))
consumer = kafka.KafkaConsumer(bootstrap_servers=['localhost:9092'])
Next, in the same file, we establish a function to do the following:
- Print an error message if data fails to deliver
- Check if the topic we want to send data to exists
- Generate example data via a while loop
1
2
3
4
5
6
7
8
9
10
11
12
13
14
15
16
17
18
19
20
21
22
23
24
25
def acked(err, msg):
    if err is not None:
        print("Failed to deliver message: {0}: {1}"
              .format(msg.value(), err.str()))
    else:
        print("Message produced: {0}".format(msg.value()))
try:

    if topic_name in consumer.topics():
         print(topic_name+" exist")
    else:
        client.ensure_topic_exists(topic_name)

    consumer.close()
    client.close()

    while True:
        longitude = np.random.randint(-180, 180)
        latitude = np.random.randint(-90, 90)

        print(f"longitude: {longitude} latitude: {latitude}")
        sensor_data['longitude'] = longitude
        sensor_data['latitude'] = latitude
        producer.send(topic_name, value = sensor_data)
        sleep(3)
Let’s run our created code to produce data to be sent to the Kafka server.
1
C:\Users\VP1050\OneDrive\Documents> python3 PublishVehicleCoordinates.py
Below is an example of correct output.

Using Node.js to initiate data consumption
Ensure that node-rdkafka is installed in order to create the consumer.
1
C:\Users\VP1050\OneDrive\Documents> npm install node-rdkafka
Also, ensure that Node.js is installed on your machine to run the web server.
Defining the Kafka Consumer
We will borrow from Confluent example code to define a function that subscribes to a topic and consumes data. We wil add 1 line to the myconsumer function to return the response. We will add another line of code outside of the myconsumer function so that the function can be executed by a javascript file within the same directory.
1
2
3
4
5
6
7
8
9
10
11
//myconsumer.js
const myconsumer = function myconsumer(topic){
    const Kafka = require('node-rdkafka');
    const bootstrapServers = 'localhost:9092';
    var response = "";
    //Code
    //...
    return response;
}
exports.myconsumer = myconsumer
Next, the server.js file will complete the following:
- Create a UI Button
- Call the myconsumer function in the consumer.js file upon clicking the button
- Give user feedback once data is consumed.
1
2
3
4
5
6
7
8
9
10
11
12
13
14
15
16
17
18
19
20
21
22
23
24
25
26
27
28
29
30
31
32
33
34
//server.js
const express = require('express');
const consumer = require("./myconsumer");
const app = express()

app.use(express.json());
let options = {
    dotfiles: "ignore",
    redirect:false
}

app.use(express.static('public',options))

app.get("/",(req,res)=>{
    var response = `
    <html>
        <h1>Confluence Kafka REST</h1>
        <div>
        <form action="/consumer" method="get" >
            <input type="submit" value="Consume Vehicle Coordinates"/>
        </form>
        </div>
    </html>`
res.send(response)
}
)
app.get("/consumer", (req,res)=>{
    let topic = "vehicle-coordinates"
    response = consumer.myconsumer({topic:topic})
    res.send("Success- Consumed: " +topic);
})


app.listen(5000,()=>console.log('Listening on 5000'))
Initiating Data Consumption
Next, let’s start the node.js server.
1
C:\Users\VP1050\OneDrive\Documents> node server.js
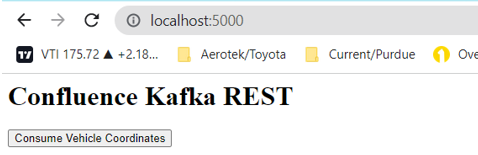
The app is listening on localhost:5000. The data is already being produced if the python file in the first step is running. We can now run the app and consume data by clicking the “Consume Vehicle Coordinates” button:
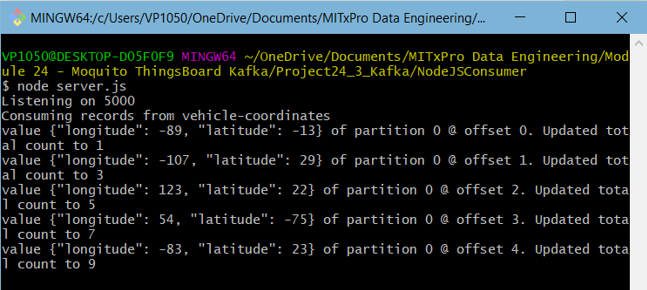
We can view the data consumed in the console window running the server.js file. The data is also visible in the Confluent dashboard:
Conclusion
With Kafka, Python, and Node.js we can create a data streaming process to control data flow to a broker. Adjustments could be made to pull the python data from another source, or have the data consumed on a schedule rather than upon user interaction defined in javascript. The project files can be downloaded on Github.